Selamat siang kawan, mungkin akhir akhir ini gue akan bikin artikel tentang apliaksi android terus, insyaallah :)
Untuk postingan kali ini gue akan post tentang aplikasi olah foto di android, After Focus.
Menurut gue pribadi, aplikasi olah foto yang satu ini sangat keren. Kenapa? Coba aja deh sendiri :D
Ini Penjelasan tentang After Focus Dari Google Play Store (yang sebelumnya Android Market)
Spoiler Untuk lihat Penjelasan After Focus:
Bring DSLR-like Photography to Your Smartphone
Thank you for your interest in our product AfterFocus.:)
and we're sorry for the confusion about Pro version.
Pro version has not been released yet, but is expected to be released in May.
Thank you.
Feel free to email to the developer for any bugs, suggestions and comments.
====================================================
With AfterFocus, you can create DSLR-style background blurred photo by simply selecting focus area. Also, various filter effects offer you to create the most natural and realistic photo.
Selecting a focus area more precisely, you can achieve more natural and professional image.
Just mark the areas you want, AfterFocus automatically recognizes the focus area precisely even for an object with complex shapes.
This auto function allows you to work faster on smart phones with small screen.
Also, background blur effect of AfterFocus gives a photo the realistic look between the edge of the background and the focus area.
With our realistic filter effects, you will enjoy photographing and photo editing even more, and share them on SNS easily.
1. Smart focus area selection
Simply draw some lines inside a focus area and the background, then AfterFocus will automatically recognize the focus area. You can also select the area with traditional finger painting.
2. Background Blur effect
You can create the most realistic blur effect with various aperture styles just like DSLR camera.
To emphasize that certain things move, Motion blur effect is also available.
3. Filter effect
AfterFocus offers from basic effects to professional effects like Cross Process without looking artificial.
Also, you can emphasize the spot light on the background using Bokeh effect.
4. Double photo (Pro version only)
Take a picture of one object and move slightly to the right to take another picture of the same object, and it will analyze the images and recognize the nearest object, so there is no need to draw the focus area.
(Make sure that the background and the distance of the object are far enough and have clear texture to get a great result.)
5. Easy share
You can share through e-mails and SNS easily and simply.
Tag:
photo focus camera lens dslr facebook twitter sns photoshop blur bokeh effect image editing aperture dof
Cara penggunaan nya juga cukup mudah.
Berikut gue jelasin cara gunainnya. (Sebenernya sih udah ada dari After Focus nya, cuman disini gue ngasih sedikit penjelasannya aja, biar lebih afdol hehe.. Abaikan.)
1. Download Aplikasinya, Gratis kok di Play Store (link diatas.)
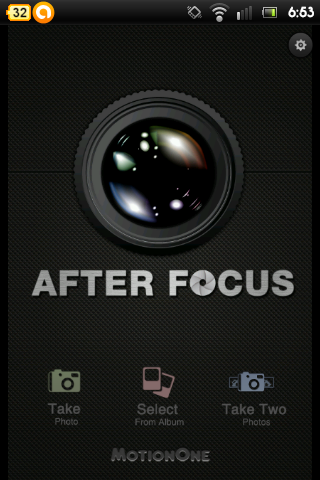
2. Buka After focus lalu pilih dari mana gambar akan di ambil, ambil langsung dari kamera atau dari galery? untuk pilihan "Take Two Photo" Hanya ada di fitur Pro.
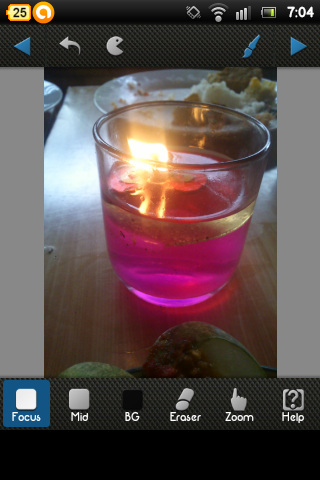
3. Setelah itu pilih gambarnya, disini gue ngambilnya dari galery aja, biar gak ribet hehe, lalu akan terbuka gambar nya seperti ini:
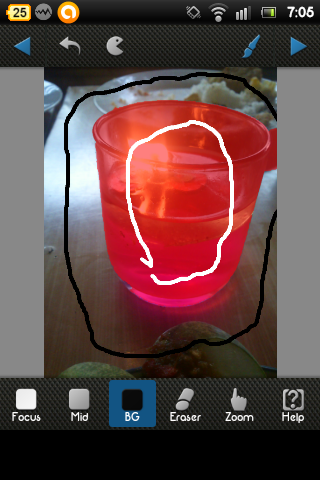
4. Setelah itu tahap penyeleksian, untuk memilih objek yang ingin di Fokuskan, pilih yang dari menu dibawah "focus" (Berwarna putih), lalu pilih area yang ingin di fokus kan, disini gue mau ngefokusin objek lilin nya, jadi kayak gini:
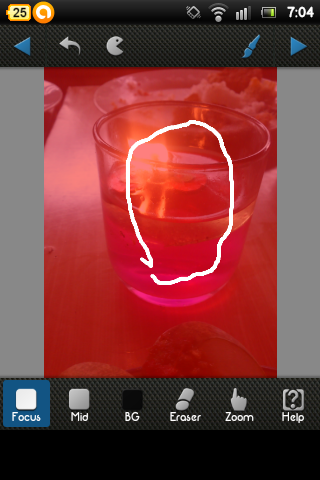
5. "Lho kok merah2 gitu?" Tenang aja, ini cuma sementara kok, cuma nentuin kalo objek yang ingin di fokusin yang berwarna itu, setelah itu pilih "BG" (yang berwana hitam) yang ada di bawah lalu pilih area mana yang ingin di tidak fokuskan.
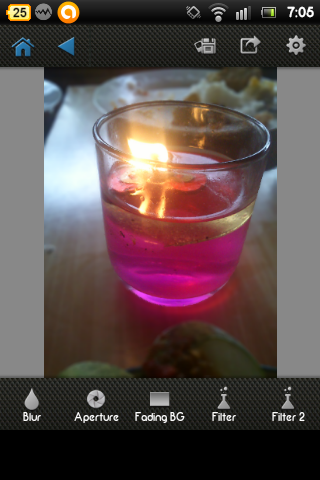
6. Nah setelah jadi seperti itu dan menurut kalian sudah selesai penyeleksiannya, touch icon yang ada di pojok kanan atas, yang seperti lambang "Play". Maka gambar Siap untuk di edit, awal nya akan menjadi seperti ini
Selesai, edit gambar nya deh se kreatif mungkin, untuk menyimpan gambar yang sudah diedit, touch gambar disket yang ada di pojok kanan atas. Lalu Simpan.
Oia ini gue juga udah buatin videonya kalo tutorialnya masih kurang jelas. :)
Check this out:
Bagaimana? Cukup mudah bukan? :)
Sekian postingan dari gue, kalo ada yang kurang jelas, ditanyakan saja lewat Buku Tamu atau Follow Twitter gue di @Adityajanata :)
Terima kasih sudah membaca artikel ini, apabila artikel ini bermanfaat, silahkan share ke teman teman kalian atau blog kalian, tapi jangan lupa sertakan link hidup menuju ke blog ini sebagai sumbernya yaa. (contoh: adityajanata.blogspot.com)


keren min, segera di download...
ReplyDeletehttp://cody.id/produk/blower/blower-cody-858-digital/